
Maine Coon Ear Cleaning and Ear Mites: An Owner’s Guide
The first time I lifted one of those huge, tufted ears and looked properly inside, I was surprised by how much was going on in there. There was warm pink skin, a little golden wax, and a forest of fine hair guarding the opening. Nothing was wrong, but I realised that an ear that size needs a routine, not guesswork.
Ear checks are now part of my week, like nail trims and litter trays, and I am Umar, I live with Maine Coons, so the routine had to become second nature rather than a chore.
I am not a vet, and I will not pretend to be one in this guide. What I can share is the calm, safe routine that works in my home, and the clear line where I stop and hand over to a vet.
Why Those Big Ears Trap So Much
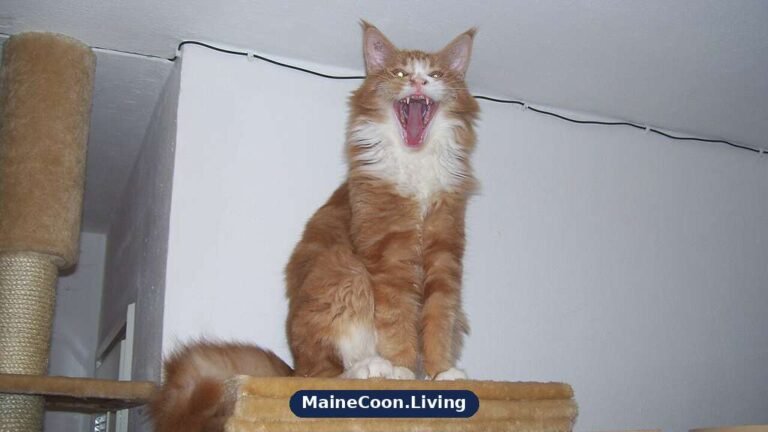
Maine Coon ears are tall, wide at the base, and finished with lynx tips and long inner furnishings. That hair looks beautiful, and it does help keep dust and cold air out on a windy day. It also slows air flow, holds warmth and moisture, and hides wax and debris from a quick glance.
A smaller, more open ear often dries out on its own after a shake or a groom. A Maine Coon ear can stay a little damp and sheltered, which is a friendlier place for wax to build up and for irritation to start. That is why I look inside even when my cat seems perfectly happy.
Size also means there is simply more ear to check, from the outer folds to the dark turn of the canal. Dirt can sit in one fold while the rest of the ear looks clean. A slow, full look once a week tells me far more than a quick glance while my cat walks past.
What Healthy Ears Look Like
A healthy ear is pale pink inside, smooth, and mostly clean to look at. You may see a small amount of light tan or pale golden wax, and that is normal for most cats. The skin should not look angry, swollen, crusty or wet.
Healthy ears also have almost no smell when you are close to them. A strong, sweet, sour or musty odour is never something I ignore, even if the ear looks tidy. Smell is often the first clue that yeast or bacteria are growing where they should not.
Behaviour matters just as much as what you can see. A cat with comfortable ears will let you stroke the head, rub the chin and touch the ear base without flinching. New scratching, head shaking, ear flattening or pulling away is information, and I treat it that way.
The L shaped canal, in plain terms
A cat ear canal is not a straight tube. It runs down, then turns sharply sideways before it reaches the ear drum, which is why you can see only the outer part no matter how good the light is. That bend is where wax and debris collect, and it is also why nothing should ever be pushed into the canal at home.
The bend also explains why a cat can have a dirty looking outer ear and a healthy deep canal, or the reverse. What you see from outside is only the entrance hall, and the real story sits around a corner you cannot reach. That is the whole point of the vet otoscope, which looks around the bend and checks the drum itself.
If you want the wider health picture that sits behind ear care, my guide to Maine Coon health problems covers the conditions owners watch for most. Ears are only one part of that picture, but they are one of the easiest parts to check at home. A minute with good light can save a much harder week later.
My Weekly Ear Check
I pick a calm moment, usually after dinner, when my cat is sleepy and settled on the sofa. I sit beside him, stroke his shoulders first, and only then lift the ear flap gently with one hand. Rushing this, or grabbing an ear during play, teaches a cat to dread the whole thing.
With a phone torch held to the side, never pointed straight and harsh into the ear, I look at the outer folds and the opening of the canal. I check the colour, the amount of wax, and whether there is any dark grit, discharge or sore patch. Then I do the same on the other side, because one clean ear tells me nothing about the other.

Most weeks, that is the whole job, and it takes less than two minutes for both ears. If both ears look pale, clean and calm, I give a treat and we are done. I only move on to cleaning when I can actually see wax or surface dirt that needs lifting.
This habit also fits neatly into the rest of my routine in the Maine Coon cat care guide, where ears sit alongside coat, teeth, weight and litter habits. Small checks done often beat one big, stressful inspection done rarely. Your cat learns the pattern, and you learn what normal looks like for that one cat.
How I Clean Ears, Step by Step
Before I start, I set out everything in reach, so I never have to let go and hunt for supplies. I use only a vet approved ear cleaner made for cats, plus cotton wool pads or gauze, and a few favourite treats. If the ears look sore, swollen or very dirty, I skip cleaning completely and call the vet instead.
- Settle your cat on a towel on your lap or beside you, with a helper if your cat wriggles.
- Lift the ear flap gently and fill the opening with ear cleaner as the product label directs, without forcing the nozzle deep inside.
- Massage the soft base of the ear for about twenty seconds, and listen for a soft squelch as the cleaner moves.
- Let go and let your cat shake his head, which brings loosened wax and cleaner back up to the opening.
- Wipe the outer ear and the folds you can easily see with cotton wool or gauze wrapped around your finger.
- Use a fresh pad for the second ear, then give a treat and calm praise straight away.
I wipe only what I can see on the outer ear and at the entrance of the canal. I never chase wax deep inside, and I never keep wiping until the pad comes out spotless. A little remaining wax is normal, and over cleaning leaves skin raw and sore.
How to use ear cleaner properly
If you do use a vet approved cleaner, the method matters as much as the product. Put a few drops into the ear opening, fold the ear flap down gently and massage the base for a few seconds so the liquid reaches the wax, then let your cat shake and wipe away whatever comes out onto the outer ear. Never pour cleaner deep inside, and never use a full syringe of liquid in an ear you have not had checked.
Clean only one ear at a time if your cat is new to this, and stop while it is still going well. A short, calm clean once a week, or only when you can see wax, beats a long battle every month. Our routine in how to groom a Maine Coon cat keeps ear care in its place alongside coat, teeth and nails, so it never becomes a big event.
The video below shows the same gentle approach, with a vet nurse cleaning a cat ear calmly and stopping at the outer ear. Watching a real pair of hands do it once made my first clean far less nerve wracking. Notice how much of the method is patience, treats and letting the cat shake.
If my cat panics, bites, cries or keeps pulling hard away, I stop for the day. A half cleaned ear is not an emergency, but a frightened cat who learns to fear handling is a long term problem. We try again on a calmer day, or the vet team does it with better tools and more hands.
What I Never Use, and Why
Cotton buds pushed into the canal are the one tool I never use at home. A bud can pack wax deeper, scratch the delicate lining, and in the worst case damage the ear drum if a cat jerks suddenly. The canal turns sharply, so what feels like gentle probing from outside is not gentle at all inside.
I also keep hydrogen peroxide and rubbing alcohol well away from my cats ears. Both can sting fiercely on inflamed skin, dry and crack the lining, and turn a mild problem into a painful one. A cat who has been stung once will fight hard the next time anyone goes near that ear.
Homemade vinegar mixes and olive oil folk remedies get the same answer in my house, which is no. Vinegar can burn sore skin and does not treat mites or infection, while oil traps debris, coats the canal and can make a vet exam harder to read. If a remedy sounds like kitchen folklore, it does not go in an ear that connects to balance and hearing.
The same caution applies to leftover drops, dog ear products, and anything a friend swears worked for their pet. Cat ears, and cat bodies in general, handle many products very differently from dogs. If it was not approved by a vet for this cat and this problem, I do not use it.
Ear Mites, Explained Honestly
Ear mites are tiny parasites with the scientific name Otodectes cynotis, and they live on the surface of the ear canal. They feed on wax, oils and skin debris, and their movement and waste irritate the ear lining. Cornell Feline Health Center explains the signs and risks clearly in its guide to ear mites in cats, which I keep bookmarked.
The classic clue is dark, dry, crumbly debris that looks like coffee grounds packed into the ear. Alongside that, most cats scratch hard at the ears, shake their heads, and rub their faces on furniture or the floor. Some cats scratch sores behind the ear or lose hair there from sheer persistence.
Mites are very contagious between pets that share beds, sofas and grooming time. A new kitten, a visiting cat, or close contact with an affected dog can bring them into a home that has never had them before. That is why one itchy cat in a multi pet home is a household question, not a single cat question.
Left alone, mites rarely stay a small problem for long. Constant scratching can open the skin to bacterial infection, and a cat can burst a blood vessel in the ear flap and develop a swollen aural haematoma. The kindest and cheapest time to act is at the first week of unusual scratching, not the fourth.
How fast mites spread, and how long treatment takes
Ear mites live for about three weeks, and their eggs keep hatching after the adults are gone, which is why a single treatment almost never finishes the job. Your vet will usually plan two or three rounds spaced to catch each new hatch, and that schedule is worth following exactly even when the scratching stops early.
Because mites spread so easily between pets, every cat and dog in the house usually needs treating, even the ones who look fine. Wash bedding on a hot cycle during treatment week and keep notes of the dates, so the follow up visit can confirm the ears are truly clear. Cornell explains the mite lifecycle and the signs in its guide to ear mites in cats, and it is the clearest summary I have found.
Mites, Yeast, Dirt or Infection
This is the part where I want to be completely honest with you, as one owner to another. I cannot reliably tell mites, yeast, plain dirt and bacterial infection apart by looking, and neither can most owners, however experienced they feel. The signs overlap so much that guessing wrong usually means treating the wrong thing while the real problem grows.
A vet has two simple advantages that I do not have at my kitchen table. With an otoscope, a vet can look deep into the canal and check the ear drum, and with a swab, the debris can be examined under a microscope for mites, yeast and bacteria. That short exam turns a guess into a diagnosis, and the treatment that follows actually matches the cause.
| What you see | What it could mean | What to do |
|---|---|---|
| Dry, dark, crumbly debris like coffee grounds, with intense itching and head shaking | Ear mites are a strong possibility, often with extra wax and irritation | Book a vet visit for a swab check, and do not start leftover drops at home |
| Dark brown or black waxy discharge with a sweet or musty smell, and red skin | A yeast overgrowth in the ear canal is possible, often after moisture or allergies | Book a vet visit, keep the ear dry, and avoid home mixes that can feed the problem |
| A small amount of light tan wax, no smell, and a calm cat who is not scratching | Plain wax and surface dirt, which is normal for many Maine Coons | Clean gently with vet approved cleaner only if needed, then keep up weekly checks |
| Yellow or green discharge, strong smell, pain, swelling or a hot, red ear | A bacterial infection is possible, sometimes alongside mites or yeast | See a vet promptly, do not clean deep, and do not use another pet medication |
Use the table as a guide to how urgent things look, not as a diagnosis in your living room. Two different problems can sit in the same ear at once, such as mites plus a bacterial infection from scratching. Only a swab can untangle that, which is why persistent signs always earn a vet trip in my house.
Grooming habits matter here too, because a matted, damp coat around the ears can hide early redness. My routine in how to groom a Maine Coon cat keeps the hair around the ears tidy without shaving the furnishings away. Tidy is good, but I never trim deep inside the ear or pull hair out of the canal.
Red Flags That Need a Vet
Some signs move an ear problem straight out of home care territory, and I do not wait and watch with any of them. A head tilt, walking in circles, falling over or rapid eye flicking can mean the middle or inner ear is involved. Those balance signs need a vet the same day, not a clean and a hopeful weekend.
- Head tilt, balance problems, or eyes flicking from side to side
- Swelling of the ear flap, a soft fluid filled bulge, or swelling around the ear base
- Pain, crying, hissing or biting when the ear or head is touched
- Blood, pus like discharge, or a strong and worsening smell
- Sudden hearing loss, deep redness, or a cat who hides and stops eating
An aural haematoma, that soft swollen pillow on the ear flap, deserves its own warning here. It usually follows hard scratching or head shaking, and it will not settle properly with home care alone. A vet needs to treat both the swelling and the ear problem that caused the scratching in the first place.
If you live with more than one pet, red flags also change what you do at home that day. Keep the affected cat calm and indoors, stop shared rough play, and note when the signs started and what you have seen. That short timeline is genuinely useful to the vet, and it is something only you can provide.
Ear checks for kittens and new arrivals
A new kitten deserves an ear look in the first week home, because mites travel with kittens more often than owners expect. Check both ears in good light, note any dark debris or smell, and mention what you found at the first vet visit rather than trying to clean a dirty ear yourself first.
The same first week check applies to any adult cat you adopt, since a quiet ear problem is easy to miss in the excitement of a new arrival. Our first week home guide covers the settling in routine in order, and ears sit in the same first week list as food, litter and a vet check.
How Treatment Works, in General Terms
When mites or infection are confirmed, treatment is prescribed by the vet for that cat, that ear and that diagnosis. It often starts with a careful clean at the clinic, so medication can reach the skin instead of sitting on top of debris. I will not list doses or name products as prescriptions here, because that choice belongs to the vet who examined the ear.
In most multi pet homes, the vet will advise treating every cat and dog in the household, even the ones who are not scratching. Mites travel quietly on a pet who shows few signs, and treating only the obvious case is how infestations bounce back. Washable bedding gets a hot wash in my house during treatment week, on vet advice.
Follow up checks are part of treatment, not an optional extra for keen owners. A recheck lets the vet confirm the mites or infection are truly gone, look at the ear drum again, and stop or change treatment at the right time. Skipping it because the scratching stopped is how a half cleared ear flares up again a month later.
During any treatment course, I keep my own cleaning gentle and exactly as the vet directs, no more and no less. Some prescribed treatments should not be mixed with extra cleaning, because the cleaning can wash the medicine away. When in doubt, I phone the clinic and ask, rather than layering my routine on top of theirs.
Keeping Ears Calm Long Term
Long term ear care in my house is boring on purpose, and boring is good with ears. A weekly look, a gentle clean only when needed, dry ears after any bath, and quick action on new scratching covers almost everything. The goal is not spotless ears every day, it is calm ears that never get the chance to spiral.
I also keep notes, just a line on my phone with the date and what I saw in each ear. Patterns jump out of those notes, like wax building faster in spring, or one ear always needing more attention than the other. Those notes have made more than one vet visit shorter and more useful.
If you share your home with several animals, the social side matters as much as the cleaning side. My notes on whether Maine Coons get along with other cats cover introductions, and slow introductions also lower stress scratching and close contact surprises. A calm household is, quietly, an ear health tool as well.
Those big tufted ears are one of the things I love most about this breed, and they deserve the same steady care as that famous coat. Look often, clean gently, never use kitchen remedies or deep cotton buds, and let a vet diagnose anything that itches, smells or swells. Do that, and ears stop being a worry and go back to being what they should be, which is simply magnificent.
Frequently Asked Questions
How often should I clean my Maine Coon’s ears?
For most indoor Maine Coons, a gentle check once a week and a clean only when you see wax or dirt is enough. Cleaning too often can irritate the ear and cause the very soreness you want to avoid. If your vet advises a different routine for your cat, follow that advice instead.
How can I tell if my cat has ear mites at home?
Dark, dry debris that looks like coffee grounds plus intense scratching and head shaking should make you suspect mites. You cannot confirm mites reliably at home, because yeast, dirt and bacterial infection can look very similar. A vet can confirm it quickly with an otoscope and a swab looked at under a microscope.
Can ear mites spread to my other pets or to my family?
Ear mites spread easily between cats and dogs that sleep, play or groom together, so vets usually treat every pet in the home. Spread to people is uncommon, and mites do not settle in human ears the way they do in a cat’s ear. Wash bedding and ask your vet whether anything else at home needs attention.
Can I use olive oil or a home remedy instead of ear cleaner?
I would not use olive oil, vinegar mixes, peroxide or alcohol in my cat’s ears. Oils can trap debris and feed a messy build up, while harsh liquids can sting, dry the skin and make an inflamed ear far worse. A vet approved ear cleaner for routine cleaning, and vet prescribed treatment for mites, is the safer path.
When should I stop cleaning and go straight to the vet?
Stop and book a vet visit if you see swelling, blood, strong smell, heavy discharge, pain, a head tilt or any loss of balance. Those signs can point to a deeper infection, a damaged ear drum or an aural haematoma, and home cleaning can make them worse. Call sooner rather than later if your cat hides, stops eating or cries when the ear is touched.